DIY Miniature GameCube
- Sep 9, 2018
- 4 min read
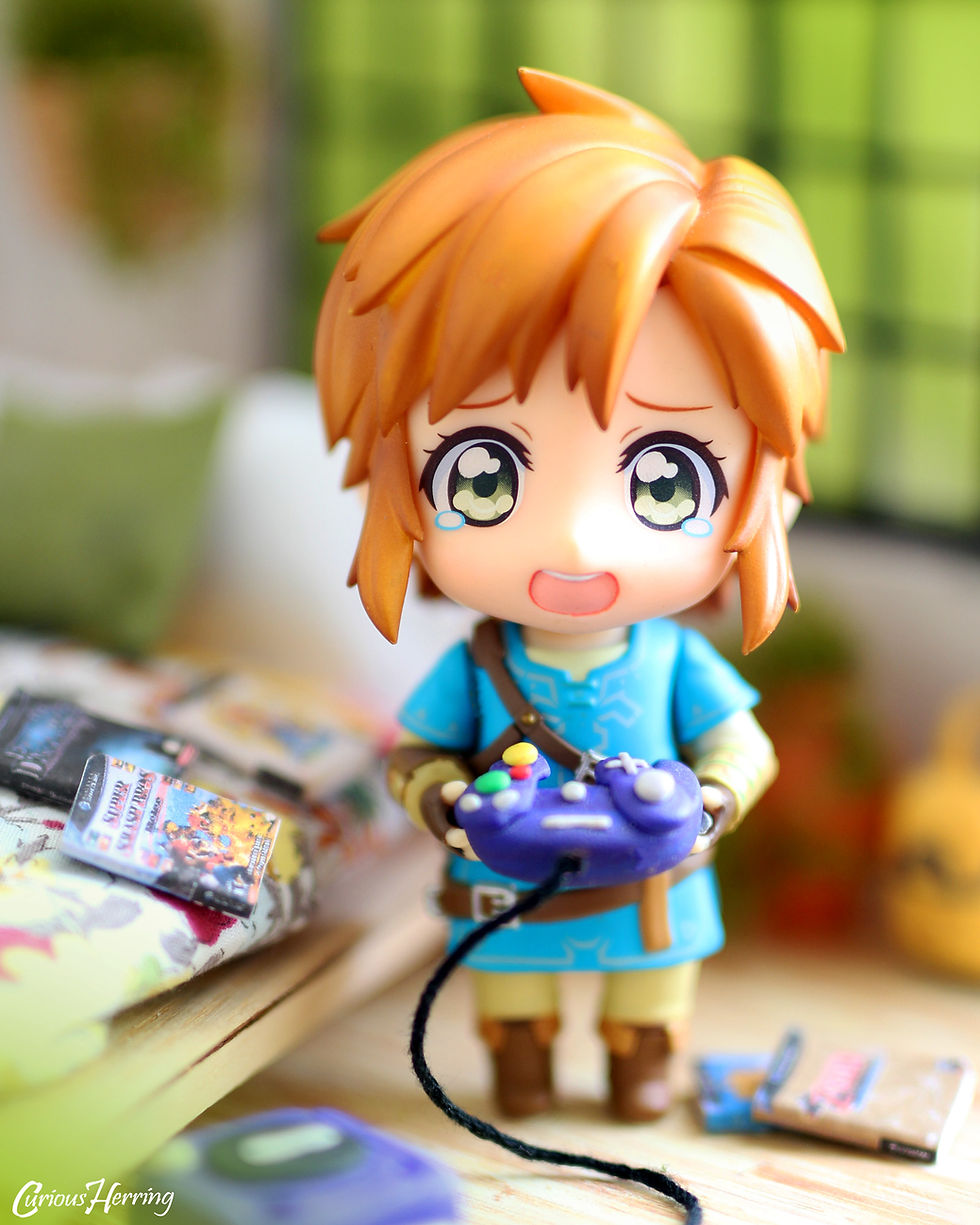
One of my favourite DIY miniature's to use in toy photography is a miniature GameCube with controllers. As a gamer I had to make sure my Nendoroids and figures are able to experience these games for themselves!

Tools Needed: - Clay (and paints) or Fimo (various colours)
- Glue (PVA)
- Black String
- Pin
- Baking Paper and oven if using Fimo
Step One: The Controller
Creating your own miniature GameCube's can be a bit of a struggle if you're not use to dealing with clay or Fimo. I tend to stick with using Fimo as I find it easier to use, and less likely to break or fall apart. The first step is to make the controller (I start with the controller as it's easier to make the GameCube to a similar size if you accidentally make your controller a little bigger or smaller than intended). Start off by making the base shapes needed for your controller. See Image 'STEP ONE'.

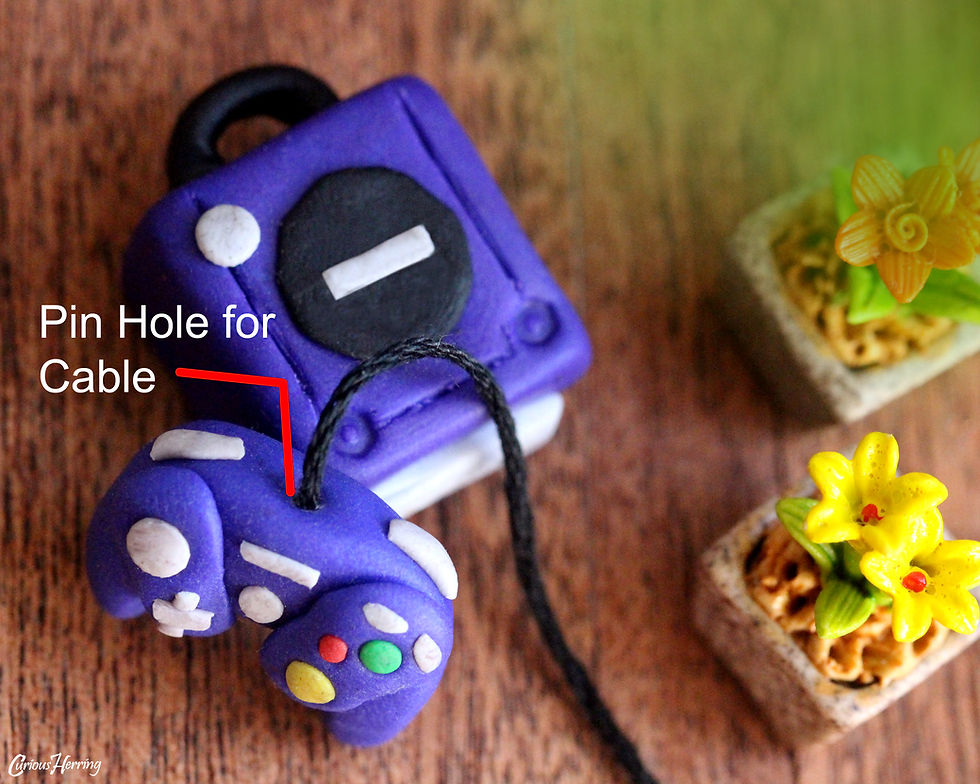
Step Two: Structure Once you have made these shapes shown in step one, simply put them together, as shown in the images 'STEP TWO'. Make sure that your two '8' like shapes are the same size and thickness, as these create the pads for where the buttons will go, and need to be as symmetrical as possible. Create a small hole (I use a pin) at the top of your controller, this will be used for the cable added at the end.

Step Three: Buttons Now to make the buttons! Roll grey Fimo into Eight small shapes as seen in Images 'STEP THREE'. This should consist of: 1. Largest ball for controller Joystick (left side of controller) 2. Smaller ball for the Start button (middle of the controller) 3. x2 thin rectangles for the X and Y buttons (right side of controller) 4. x2 larger rectangles for left and right triggers (on top of controller) 5. D Pad (+ like shape, left side of controller) 6. Long Rectangle (used as place where logo is, this part is not necessary)
Gently press these shapes onto your controller base as seen in 'STEP THREE' image.

Step Four: Coloured Buttons
Make three more ball shapes, these should be:
1. Yellow (Largest ball for C Stick)
2. Green (Middle sized ball for A button)
3. Red (Smallest ball for B button)
You can additionally make a forth button for the Z button/trigger, which is located on the top of the controller, in front of the Right trigger. I have left this out due to space on miniature, but feel free to add this in your own!
See images 'STEP FOUR'. Add these the same way you did with your grey buttons.

Step Five: The GameCube
Now that you've made your controller, set it aside on a piece of baking paper ready to be heated in the oven (if using clay, leave to air dry before painting in the colours you prefer). The GameCube itself is a lot easier and less fiddly to create. Start off by making a cube in the same colour as you made your controller. The width of this cube should be around the same size as the controller, see images 'STEP FIVE'.

Step Six: GameCube Details
The next step involves making the extra Fimo (or clay) details, where you will need to make the following:
1. Thin Black Circle (Dial in the center of GameCube)
2. Small Grey ball (Power Button)
3. Black Cylinder (Handle at back of GameCube)
4. Grey Rectangle (Controller Port at front of GameCube)
5. Small Grey Rectangle (GameCube logo)
See images 'STEP SIX'.

Step Seven: Finer Details
Before adding the extra Fimo details, use a pin to draw lines, on the top of the GameCube, down the left and right hand side, and along the front. Using a small round utensil (I used the bottom of a thin pencil) press down to make slight craters on the top of the GameCube, in the front left and right corners. This is where the GameCube's 'Reset' button and 'Opening' button to insert a game are. These can also be made out of Fimo if you prefer. Once your lines have been etched in the top of the GameCube, gently add the Fimo details you previously made.
Once you have added the controller port on the front, use a pin to add 4 small holes where the controllers would be connected.
See image 'STEP SEVEN'.


Step Eight: Drying Process
If you have used clay for your miniature, leave to dry and paint when dry. If you have used Fimo, put miniatures on baking paper and bake according to instructions provided with Fimo. Please be aware that an adult should be present at all times when using tools such as pins, and throughout baking process.

Step Nine: Adding the Cables
Once your Fimo has hardened, or clay has died and been painted, use a small amount of PVA glue to attached your black string into the hole you made previously on top of the controller. Leave this to dry in order to prevent it falling out. once you have done this you can simply attach the other end of the string into the GameCube controller port, or simply leave it detached if you do not want these pieces joined as one!
Step Ten: Gaming Time
Now your miniature GameCube is complete!
Give your toys a gaming experience of their own, photograph them gaming with their buddies, or simply use them to make the place look decorative!
This miniature can also be turned into a necklace, or even cute earrings if you get a hold of the jewellery pieces required!


Comments